 |
 |
Home
Tools
Drilling and Fixing
Putting Things Up
Repairs/Maintenance
Plumbing
Electrics
Woodwork
Decorating a Room
Tiling
Safety & Security
Saving Energy
House and Finance
Health&Safety
Disclaimer
Contact
Advertising
Useful Links
Site Map
| Preparation | ||||||||||||||||||||||
| Preparation of surfaces prior to painting can be a bit tedious, BUT, it is so important and well worth the effort to ensure good results. The more preparation you do the better the results. | ||||||||||||||||||||||
| Filling | ||||||||||||||||||||||
| I use 3 types of filler depending on what the job is | ||||||||||||||||||||||
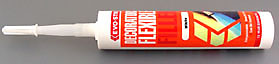
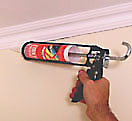
For cracks between edges like between walls and ceiling walls and skirting etc. I use decorators filler (also known as decorators caulk) with a gun applicator. This has about 10% flexibility in it so will help prevent future cracking. Available at all decorators merchants. |
 |
|||||||||||||||||||||
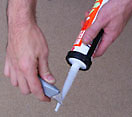
To open, unscrew the nozzle and cut the end of the filler with a sharp knife. Replace the nozzle then cut that open at a 45 degree angle approximately 15mm up. (it's tapered so the higher the cut the bigger the hole) |
 |
|||||||||||||||||||||
 |
||||||||||||||||||||||
For holes and cracks on wall/ceilings I use a general purpose light weight filler. These relatively new types of filler are great. They are easy to apply, dry quickly, don't shrink into the hole as they dry and are incredibly easy to sand. |
 |
|||||||||||||||||||||
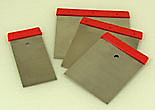
| Flexible steel scrapers | ||||||||||||||||||||||
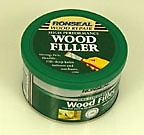
For filling wood you can use a light-weight filler but I prefer to use a two pack wood filler which gives a much tougher finish. A two pack filler comes in "two packs" a large tub of filler and a smaller tube of hardener.
NB see section on repairs and maintenance for treating/ filling exterior wood which has gone a bit rotten. |
 |
|||||||||||||||||||||
 |
||||||||||||||||||||||
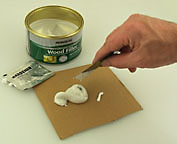
| mixing filler and hardener | ||||||||||||||||||||||
| Sanding | ||||||||||||||||||||||
Sanding is necessary to create a smooth surface on which to paint, and especially on wood, provides a key which creates better adhesion of the new paint. Sand paper comes in various grades for various jobs its roughness it indicated by a number. Generally speaking the poorer the surface, or the greater the amount you want to sand off, use a rougher sandpaper. Woodwork For bad paint work I use a 80g (medium) sheet prior to undercoating. Between coats use something a little finer like 180g (fine). If the paintwork is so very bad that it is peeling or flaking which you often find often with neglected exterior woodwork then you may need to remove the paint entirely. (see section on repairing exterior wood work.) |
||||||||||||||||||||||
| Checkout the 3M website they have a full range of sandpapers and a useful guide as to what you should use for various jobs | ||||||||||||||||||||||
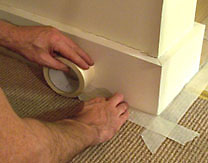
| Masking off | ||||||||||||||||||||||
Mask off any tricky to paint areas. Some rooms are easier than others. In a bedroom the only masking I tend to do is on the floor or carpet around the skirting. It takes a little time to do the properly but makes the painting so much quicker and gives much better results. On carpet I try to press the masking tape right down between the carpet and skirting. Rooms like kitchens may need more areas masked of. I would recommend you use 2" tape as any thinner is more fiddly to apply and you also risk getting paint where you don't want it. If you are very unsteady with a brush and feel you need to mask around walls etc. that's fine but make sure you use a "low tack" masking tape otherwise you might well pull off newly painted areas when you remove it. Again I would use at least 2" tape as you get much straighter lines with wide stuff. |
 |
|||||||||||||||||||||